Save to DataMap Preview Page
Overview
On the Save to Datamap preview page you can review the survey configuration done on the Survey to Datamap Configuration page, make edits to it if needed and approve the changes that will then reflect on the Datamap System. The new system details are finalized here before they get created.
Steps
Log in to your Data Governance Tool account.
From the hamburger menu present on the top left corner of the Dashboard, click on Survey
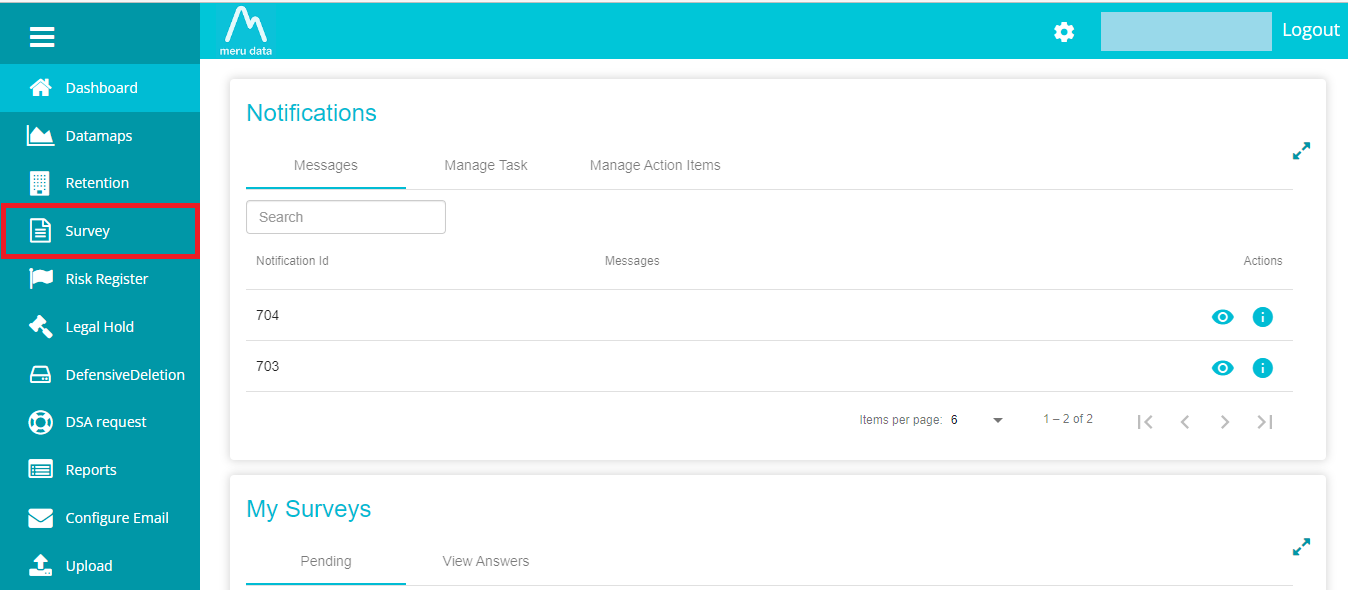
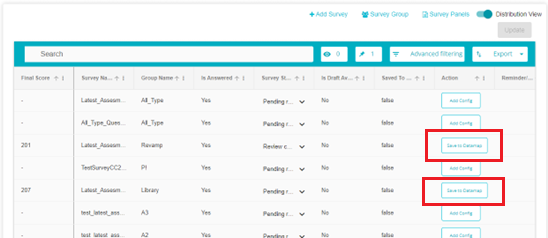
On the Survey Home page, click on the Save to Datamap button to go to the Save to Datamap preview page directly. This button will be available only once the survey to datamap configuration is complete. If the configuration is not done, click on the Add Config button to configure the questions to the datamap. Once the answers have been mapped to the Datamap, the button will change to Update to Datamap.
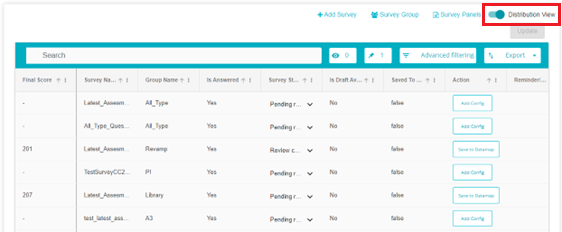
Alternatively, you can reach the Preview page another way. On the Survey Home page, disable the Distribution view if it has been enabled\
On the Survey Data page, click on the Analyse icon of the survey of your choice\
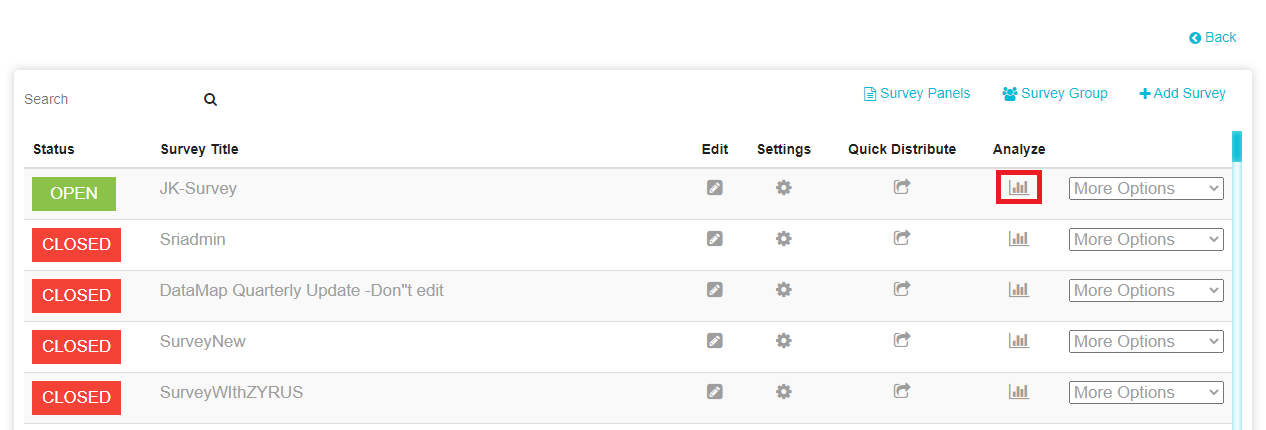
On the Settings page, click Distribution Detail\

The distribution details of the survey will now be visible\
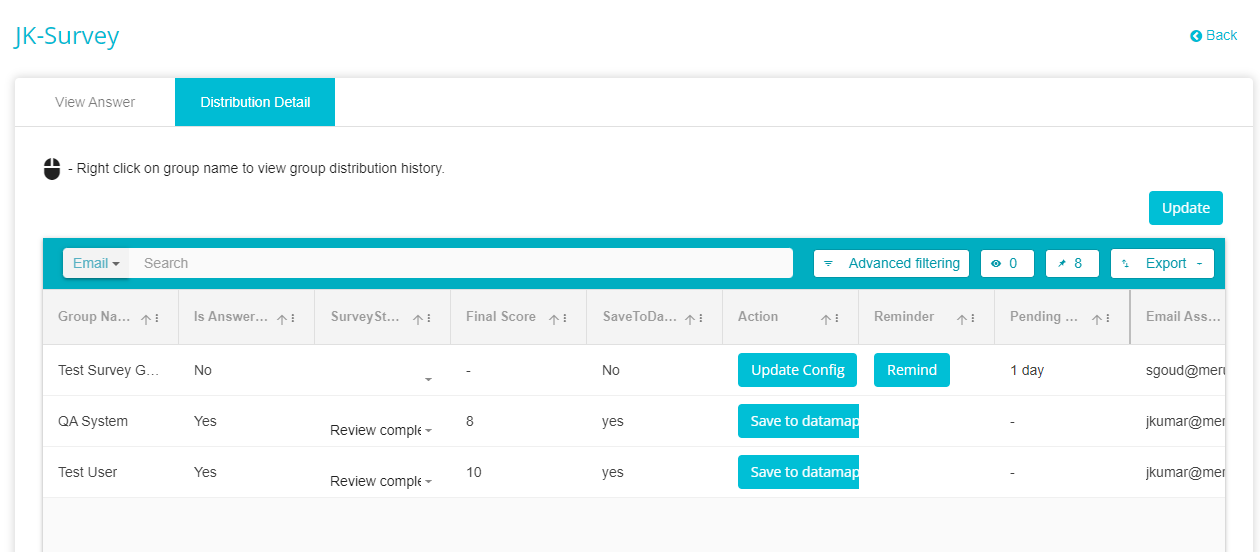
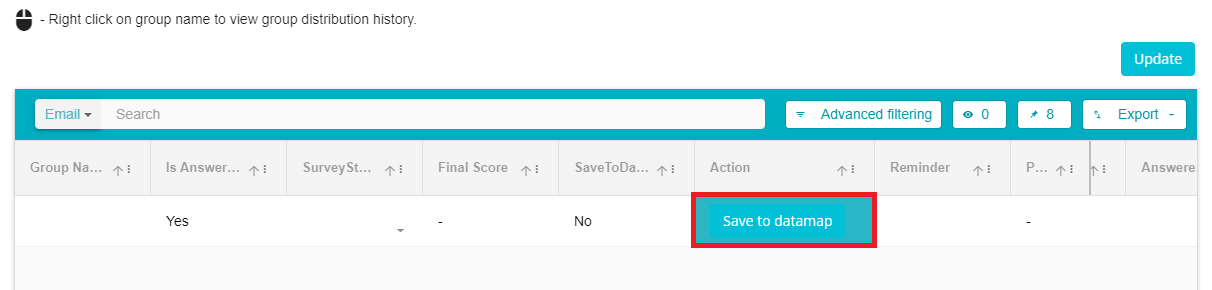
Under the Action field, click on Save to DataMap\ Note: This option will only be available if the configuration has been done and the survey has been answered\
The Save to DataMap preview page will display the following: -
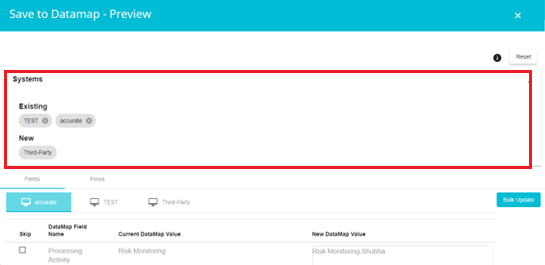
- Under the Systems drop-down menu
Existing: If the survey answers are being mapped to an existing system, those system names will appear here. Survey answers are usually mapped to the systems associated with the particular Survey Group. More than one system can be associated with a survey group. The survey group members and the associated systems can be found on the Survey Group creation page.
New: If a new system is being created, those system names will appear here. New systems are created on the Flows & DataMaps section of the Survey to DataMap configuration page.\
 \
*Note: If a new system has been added from a survey answer or changes have been made via the Bulk Edit option, the new system name and the flow details automatically get added to the survey group. This can be seen on the survey group page.*\
\
*Note: If a new system has been added from a survey answer or changes have been made via the Bulk Edit option, the new system name and the flow details automatically get added to the survey group. This can be seen on the survey group page.*\

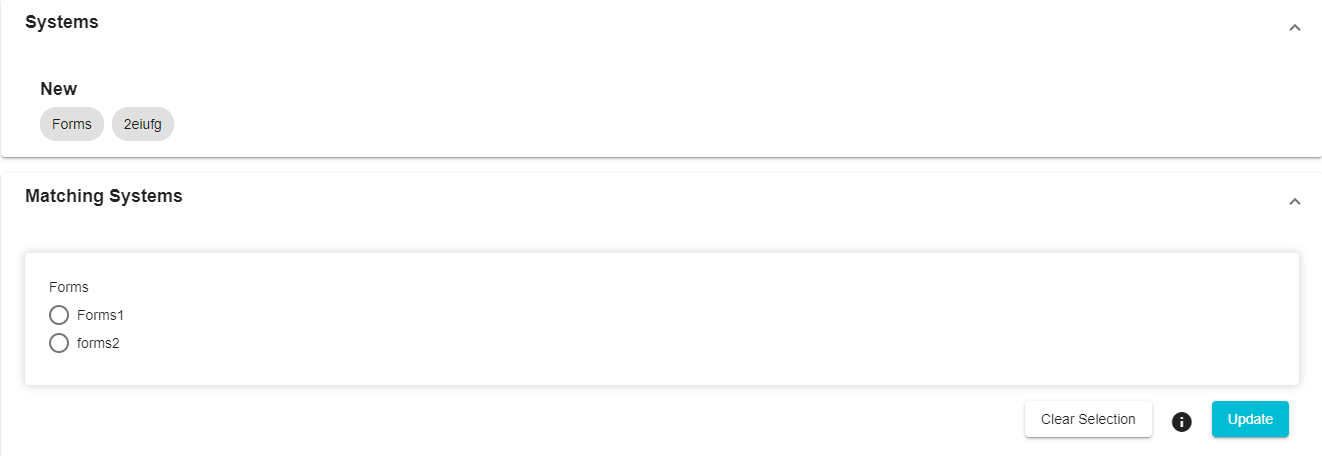
- Matching systems: This list shows existing systems with names
similar to the new systems being created.\
Here, you can click on any matching system from the list and the
survey answers will map to that system instead.\
In the example below, the newly created system Forms has a similar
name to existing systems Forms1 and forms2. If you click on Forms1
and then click update, then the survey answers will get mapped to
Forms1. Forms2 won't get created as a new system\
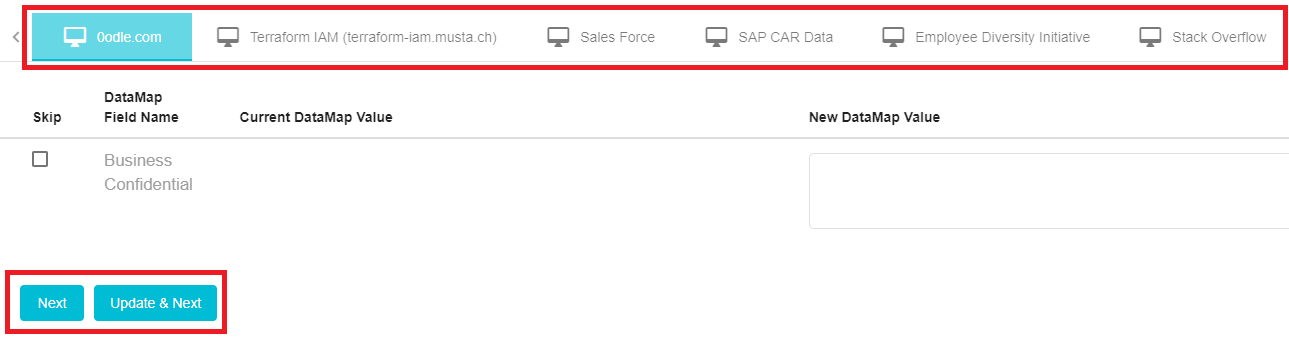
- Next, we come to the Fields section of the page. Here you will find:
The System names to which the survey answers are going to be mapped. Here, can find new and existing systems alike.\
 \
If there are multiple systems mapped, they will be displayed here.
Users can click the Next button present on the bottom of the
screen to go to the next system.\
Users can click Update & Next button to first Update the current
system before moving on to the next.\
\
If there are multiple systems mapped, they will be displayed here.
Users can click the Next button present on the bottom of the
screen to go to the next system.\
Users can click Update & Next button to first Update the current
system before moving on to the next.\
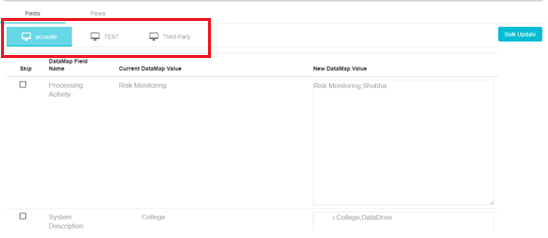
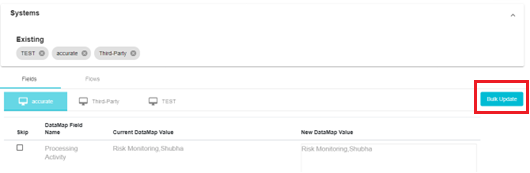
The name of the DataMap field that is being updated with each survey answer\
The current value of the DataMap field\ (In case, at the time of this configuration, some of the DataMap fields have no values in them, those fields will appear empty here)\
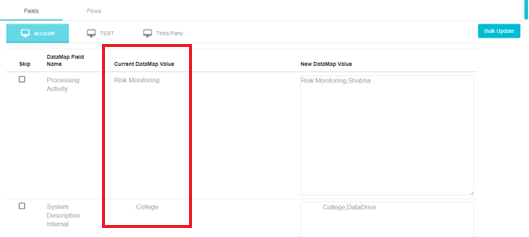
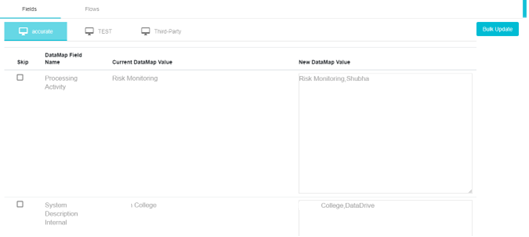
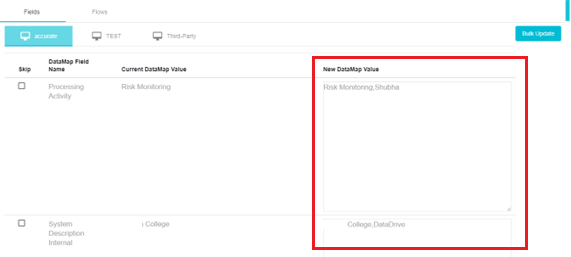
The new value of the DataMap field.\ Here, depending on the operation chosen on the Survey to Datamap Configuration page, the new value of the DataMap field will be displayed. In the below example, the existing value in the DataMap field Processing Activity is Risk Monitoring\ The user appended the survey answer -- Shubha to the field. The new value in the DataMap field will now be Risk Monitoring, Shubha (as seen in the example below)\ If, for example, the existing value in the DataMap field is Finance, the operation chosen was Replace (as is) and the survey answer was Quality Analysis, then the New DataMap value will display Quality Analysis.\ Note: Edits can be made to the new field value by clicking on the field making the required changes. Once you've typed in the value required, click enter to finalise the changes to the field. Once the Update button has been clicked, these changes will be reflected in the DataMap Systems.\
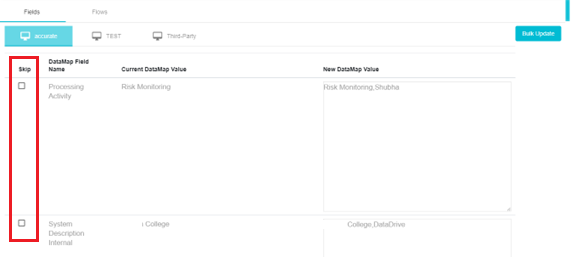
Check the Skip box if you don't want any particular DataMap field to be updated. Clicking Skip will remove that field and its config from the preview page and the existing value will remain as it was in the field.\
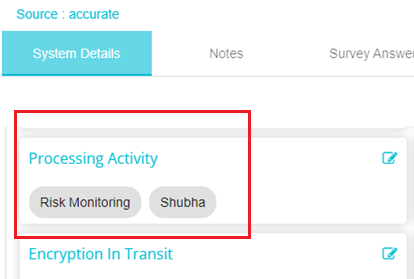
Once the review and necessary edits are complete, click the Update button present at the bottom of the screen to Update the configuration to the DataMap.\ The survey answers will now be visible in the DataMap system fields on the System Details page\
To update all the Systems at one go, instead of scrolling down and clicking Update & Next for each system, you can click the Bulk Update button\
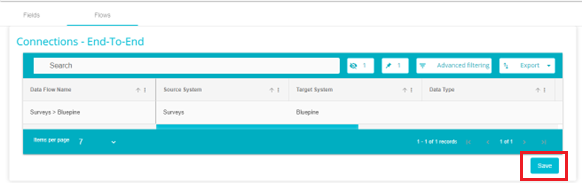
- Next, we move to the Flows section\ Here, you can find the new Data flows being created, or the connections being appended to existing flows. In this section, you will find:
The Name of the Data Flow being created\
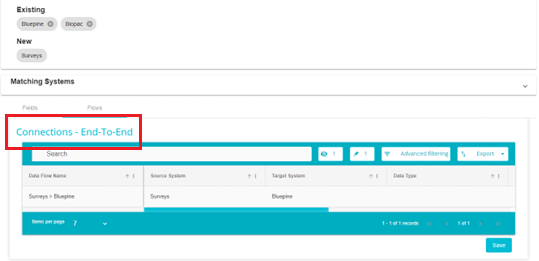
The Data Flow connection being created from the survey answer including the source system name and target system name will be displayed here. The region, data type, frequency and transfer type will also be included if the Survey to DataMap configuration has included it\
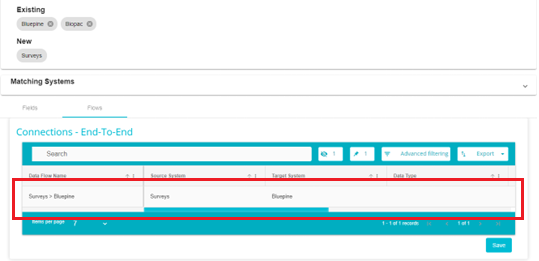
If the same user group has answered the survey multiple times and the Survey to Datamap configuration is made to create new connections, then those connections will be shown here under the existing Data Flow.\ In other words, each survey group can have only one Data Flow, however, this flow can have multiple connections if required. Updates to the survey answers will create new flows depending on the configuration.\ An example of the flow having multiple connections is show below\
Once the new flow and connection details have been reviewed, click on the Save button\
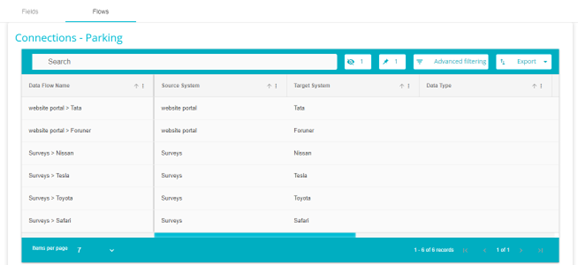
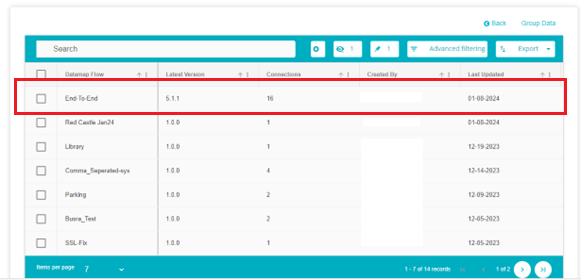
The new Data Flow can now be seen on the Data Flow page\
In case a new flow is not to be created, but an existing flow is to be updated. The existing flow can be added to the Survey Group page prior to configuring the answers on the Survey to Datamap configuration page and then saving the changes on the Save to Datamap preview page.\
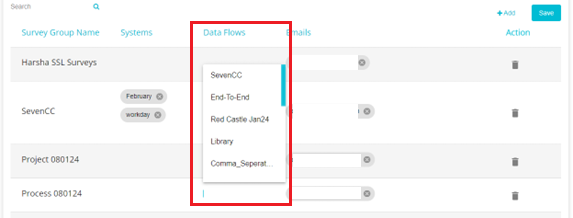 \
The survey answers can now be configured to the chosen flow
\
The survey answers can now be configured to the chosen flow